
You have
just created your Teamwork
Desk
site,
so now it's time to get set up
and
start
working!
We’re
here
to
help
you
handle
all
of
your
customer
emails
in
one
shared
collaborative
space. Effortlessly
manage
your
customer
inquiries
from
the
moment
they
arrive
to
the
moment
they
are
solved
with
our
all-in-one
customer
communication
platform. | Curriculum |
|---|---|
| ◑ Configuring
your
user
profile | |
| ◑ Updating your
notification
preferences | |
| ◑ Exploring the Home
area | |
| ◑ Inviting your
team
to
your site | |
| ◑ Creating your
ticket
inboxes | |
| ◑ Setting up
email
forwarding |
Configuring
your user
profile
Adding
a profile photo along with
your personal details will
personalize your profile and
help
your team connect with
you.
Click your profile avatar in
the
top
right of your Teamwork Desk
account
and select View Profile from
the dropdown menu.

Click
the Edit
Profile button in
the
top
right of your profile to
update
your
personal
details.

Your profile details
are grouped into three
subsections: general,
details,
and
preferences.
In the General section,
you can update your
profile
photo
as well as your first
name,
last
name, and email
address.

The Details section includes your
job title, contact phone numbers, and
time
zone.

In the Preferences section, you will
also be able to
specify your time format
preference, turn on two-factor
authentication,
enable web and
push notifications, choose
between HTML and Markdown
formatting, and change your
password.

Why not give it a try and
upload a profile photo to
make
yourself recognizable to
your
team? Just click
the Upload new
photo button
in the General
section.
Updating
your notification
preferences
Next, let's take a look at
your
notification preferences so
that
you can receive updates for
the
items
most relevant to you.
Select
the Notifications tab
at the top of your profile.

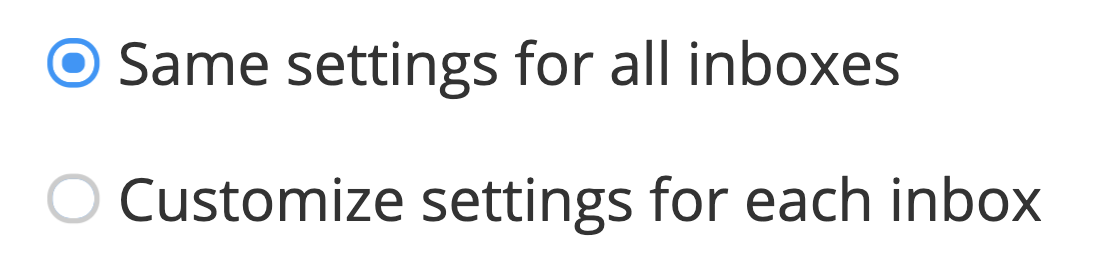
At the top of the
Notifications area, you can
choose
whether to apply the same
preferences
across all of your inboxes, or
set
them individually per
inbox.
For each individual notification
option, you can receive alerts via
email
and/or mobile. Check the relevant box
to
the
right of each notification type to
enable
the
alerts.

Exploring
the Home area
Now that you've got your profile set
up,
let's explore the Home area. The Home
area is the default
landing
page for your site and can provide you
with a
quick overview of what's happening
across
your
tickets and inboxes.
The Summary tab gives you a
big-picture breakdown of
tickets assigned to you and
the
inboxes you have access to, as
well as tickets in Training
Wheels and your
company's happiness (if
enabled for your site).
This is
all
geared towards giving you a
better
understanding of how you and
your
team
are
performing.

You can easily customize your view and
switch between grid and list view layouts
for the Summary tab via the view buttons
in the upper right corner.

Using the column
settings icon in the top right
of the inboxes list, you can customize
which ticket statuses to show as
columns. This can be done in both list
and grid view.

The
Activity tab shows all
activity
across
your site, including ticket
views,
status
changes, replies and
more.
In the
Insights section,
you'll get an overview
of relevant
information regarding tickets
and
your
agents.
The volume and average
response time
is an interactive, visual
representation of the
amount
of
tickets, replies, and
response
time in
a given time frame. Check
out
more on
Teamwork Desk metrics by
reading our
help doc article here.
Inviting your
team to your
site
Now that you have explored a
few
areas of your Teamwork Desk
site,
let's take a look at adding
some
agents so your team can start
communicating with
customers.
Head to
the People section
of your site and select
the Agents subsection.

From here, you can then click
the
green Invite
agents button in
the
top right.

From here you will be able to
add
your users to your Teamwork
Desk
site.
Simply enter your each team
member’s name and email
address.
Each time you fill out an
agent's
details, a new row will appear
for
another agent.
Use the agent type
buttons to
set whether each agent is
full
time or part time. You can
also use the administrator
toggle to give certain
users
administrator
rights.

If you have a linked Teamwork
account, you can also choose to
add
users from that site as agents in
Teamwork
Desk via the Select from Teamwork button.
When the Training
Wheels feature is enabled for
your site,
clicking Next in the
invite agents modal will allow you to
set
some of the invited agents to be in
training and set the percentage of
their
tickets that should be reviewed.
Administrators cannot be enrolled in
Training Wheels.

The last step of the invite process
is to select which inboxes the agent(s)
should
be granted access to.
Creating your
ticket inboxes
Next, let's jump into
creating
your
first inbox so you can start
communicating with your
customers.
Using inboxes, you can
easily organize and manage
your
company's correspondences with
customers.
To create your first inbox,
click
your
profile icon in the top right
of
your
site and select Settings from the
dropdown
menu.

In the settings area,
head to
the Inboxes subsection
and click the Add
Inbox button
in
the
top
right.

In the Create
Inbox modal,
you will need to set a name and
Teamwork Desk address for the
inbox.
- Teamwork Desk Address - create
a new email address for the
inbox, powered by Teamwork
Desk.
- This allows you to provide
customers with your inbox
address without the need
to set up email forwarding
from an external email
client.
- Use the text field to set
a custom email prefix for
the address.
- The domain part of the
address will be in the
format @yoursitename.teamwork.com and
cannot be changed.
- Example Teamwork Desk
address: support@mycompany.teamwork.com
By default, the Desk address field
will populate with the inbox name you
add. This can be adjusted
independently.

When you
click Create,
the
inbox will be added to your site
and
the
modal will update to show you a
list
of
the agents on your site. You can
quickly
grant access to the inbox to the
relevant
people by clicking each individual
or
using the Select
all option.

Setting up
email
forwarding
When creating an
inbox, an additional
option at the bottom
of the modal allows
you to specify an external
email address to use as a source
address for customer
contacts.
Once you click this option, an
additional field will be displayed
where you can enter an email address
such as your company's current support
email.
Note: External
forwarding is currently
only supported from
private email domains. You
cannot forward emails
from @gmail.com,
@outlook.com,
@hotmail.com etc.

When using the
external address option, you
will be shown a prompt after
the agent selection step
to set up email
forwarding from
the email address you
provided.
Once email forwarding is set up, any
emails received to that email address
will appear
in the new inbox you created.
| Summary | |
|---|---|
| Now
that you have
completed
the
introduction to
Teamwork
Desk for
administrators,
you
can
easily take the
following
actions
on your
site: | |
| Chapter | Skill |
Configuring
your
user
profile | ✓ Upload a
profile
photo ✓ Customize
your
profile
preferences |
Updating your
notification
preferences | ✓ Access
your
notification
settings
in your
profile ✓ Adjust
your
notification
preferences
for
email
and
mobile |
Exploring the
Home
area | ✓ Star some
inboxes ✓ View
recent
activity
on
tickets ✓ View your
team's
metrics and
performance |
Inviting your
team to
your
site | ✓ Invite
some
agents
to your
site ✓ Set some
people as
part-time
agents ✓ Add some
users
from Teamwork
as
agents |
Creating your
ticket
inboxes | ✓ Create an
inbox ✓ Add agents
to
the
inbox ✓ Set up
email
forwarding |
Next, why not explore our Teamwork
Desk guide and learn
about
the
new
features we introduced with the launch
of
the
new Teamwork Desk interface!