
✔ Available on
all subscriptions
| What | Create automations to send HTTP
requests to a specified URL when a
trigger event occurs. |
| Why |
|
| Who |
|
| When | You want to reduce manual
work as much as possible by
eliminating the need for your
team to remember to follow up
in Teamwork.com as tasks
progress.
|
| What | Create automations to send HTTP
requests to a specified URL when a
trigger event occurs. |
| Why |
|
| Who |
|
| When | You want to reduce manual
work as much as possible by
eliminating the need for your
team to remember to follow up
in Teamwork.com as tasks
progress.
|
Before you
start
Hypertext Transfer Protocol (HTTP) allows you
to initiate communication and create highly
customizable integrations with both internal
and external domains.
Create a HTTP
automation
Automations are accessible from any
project.
- Click Jump to in
Teamwork.com's main navigation menu.
- Search for and select a project.

- Select Automate from the project's main navigation menu to open the automations builder.
- Click Custom Automation.
- Select a trigger event in
the When section. This
is the event that'll prompt the
corresponding action(s) to
occur.
- Choose which project (or projects) the trigger should apply to (i.e. only trigger events in these projects will activate the automation). By default, only the current project is selected but you can select more.
- Fill out the trigger's property fields. For example, if "Due Date" is your trigger, you can specify the exact time of day on the due date.
- Click + add condition below the When section to further refine your trigger with additional criteria.
- Click the action field in
the Then section.
- Select Send HTTP request from
the dropdown.
- Fill out the HTTP request's details
(options are outlined in the table at the
end of this
section).
- Next:
- Stop there:
Click Create.
- Keep going: Add additional conditions,
then click Create.
The automation is created and will begin
running the next time a trigger event
occurs.
HTTP request action
properties
| URL | The request's
target HTTP or
HTTPS
address |
| HTTP
method | Choose the
appropriate
request
method:
|
| Payload | Specify the
HTTP
request's
contents
- fully
customized
request body
formatted as
JSON. 📝
Payloads are
only
available for
POST, PUT, and
PATCH
requests. 💡 Use
Markdown
syntax
to format
the
appearance
of
the
message. This
is
especially
useful
when
including
task
links.  |
| Field mapping | Include Teamwork.com
data in your
request by
combining dynamic
fields with your
request's static
text. |
| URL | The request's
target HTTP or
HTTPS
address |
| HTTP
method | Choose the
appropriate
request
method:
|
| Payload | 📝
Payloads are
only
available for
POST, PUT, and
PATCH
requests. 💡
Use Markdown
syntax
to format the
appearance of
the
message. This
is
especially
useful
when
including
task
links. |
| Field
mapping | Include Teamwork.com
data in your
request by
combining dynamic
fields with your
request's static
text. |
Zapier →
Google
Sheets example
Create a HTTP request automation to add a
new row to a Google Sheets spreadsheet
when a specific task event occurs
in Teamwork.com.
This example uses
Zapier to generate the URL required by the
automation to send data from Teamwork.com to
Google Sheets. We'll be going back
and forth between Teamwork.com and Zapier
during this setup so we strongly
recommend logging in to both
accounts in separate browser
tabs.
Step 1:
Generate a webhook
URL in Zapier
- Click + Create Zap in
your Zapier account.
- Search "webhook" in
the Trigger section.
- Select Webhooks by Zapier from the results.
- Choose Catch Hook as the event, then click Continue.
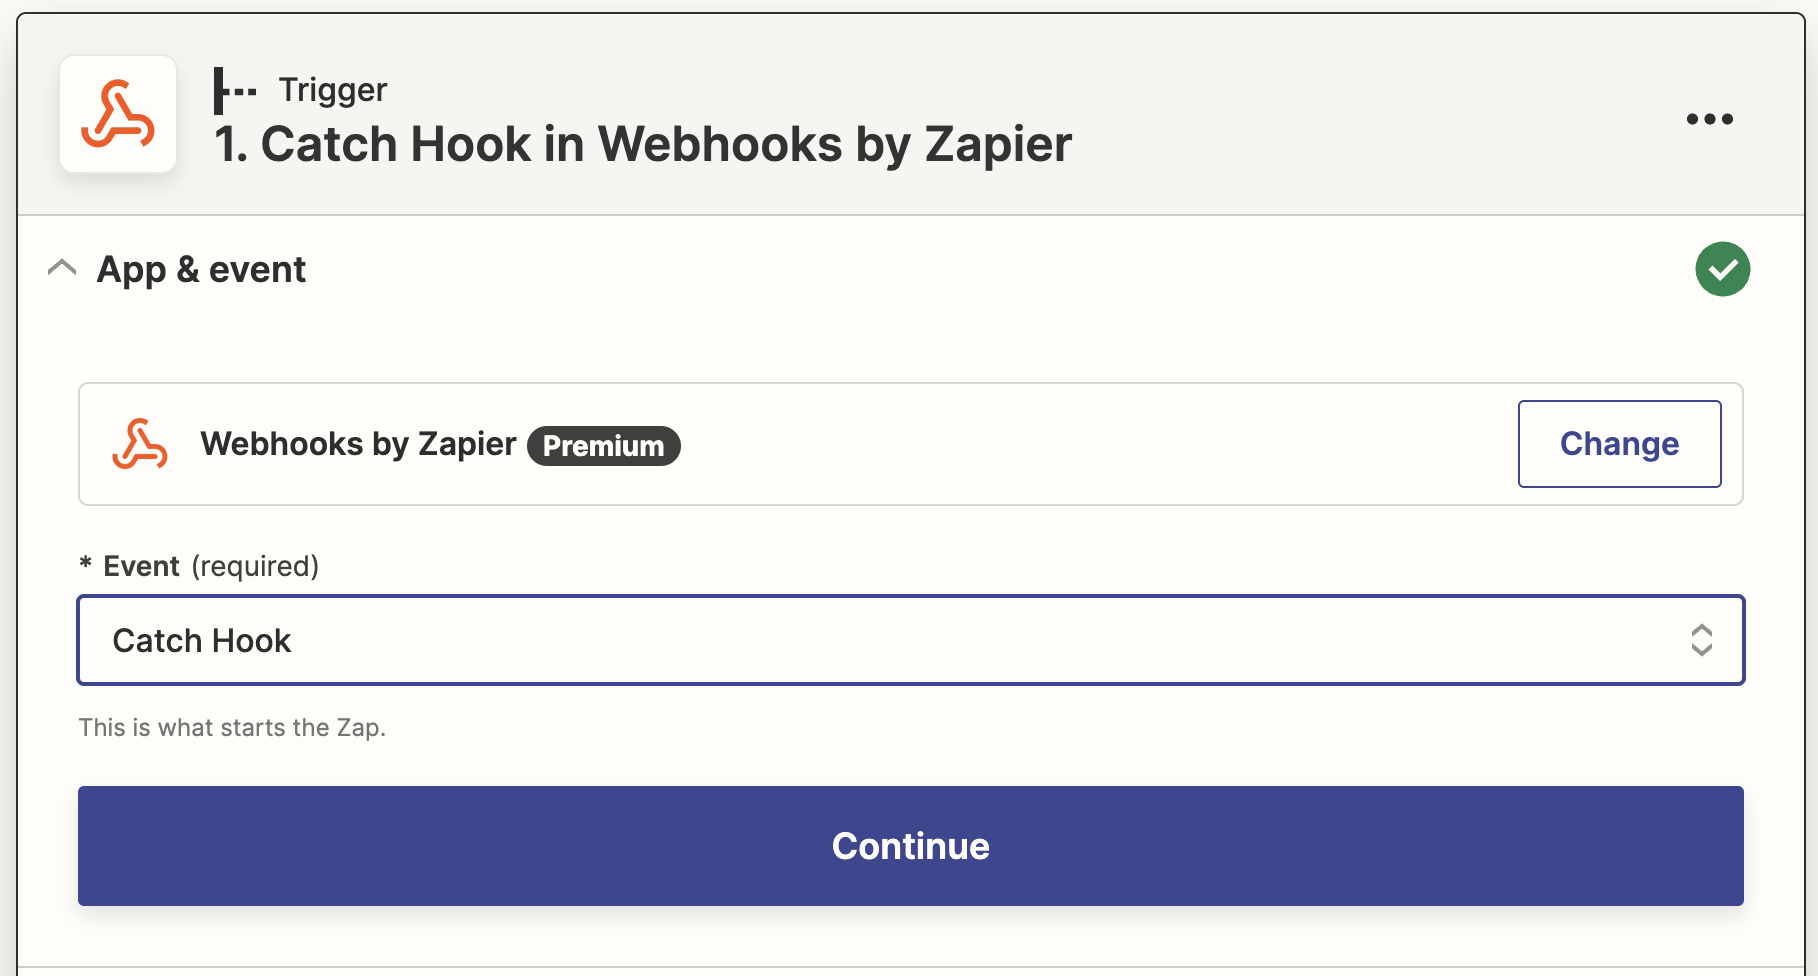
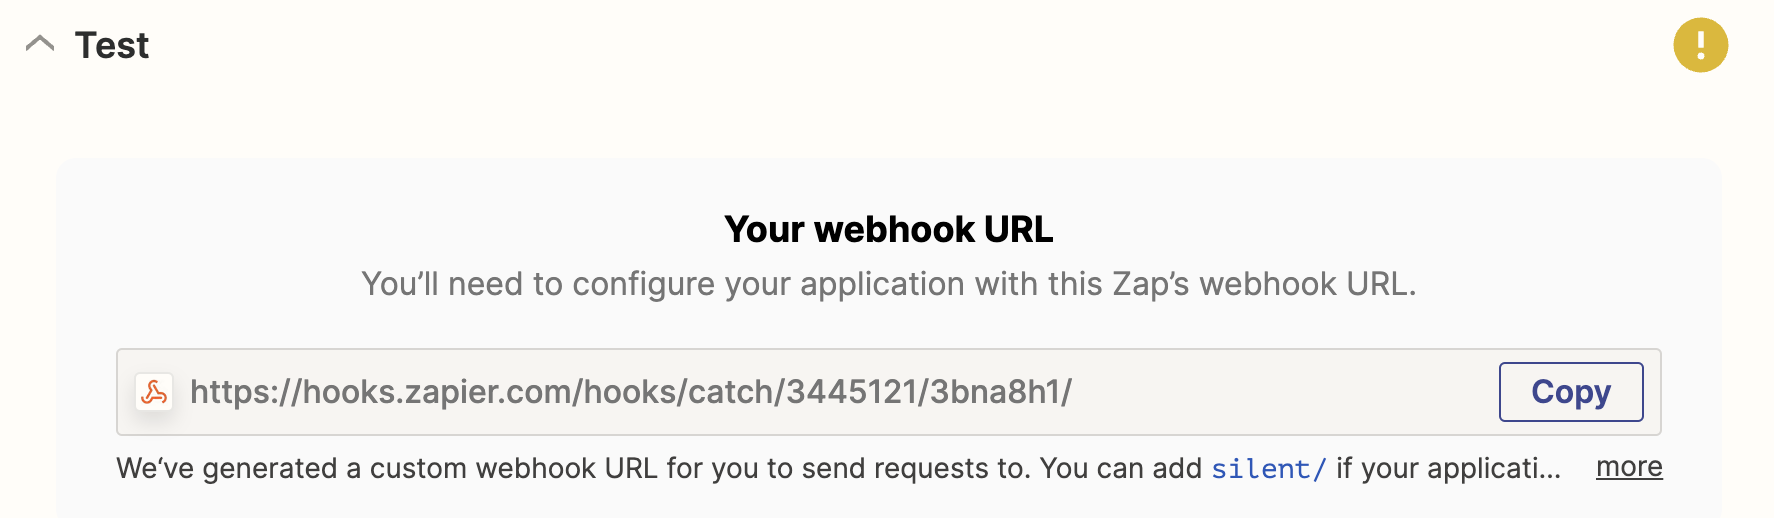
- Click Continue in the Trigger section.📝 The webhook URL is generated in the Test section.
- Select Copy beside the generated URL field.
Step
2: Create the
automation in Teamwork.com
- Click Jump
to in
Teamwork.com's main navigation
menu.
- Search for and select a
project.
- Select Automate from
the project's main navigation
menu to open the automations
builder.
- Click Custom
Automation.
- Select
a trigger event
in
the When section. This
is the event that'll prompt
the
corresponding action(s) to
occur — we went with "Tag added"
for this example.
- Choose which project (or projects)
the trigger should apply to
(i.e. only trigger events in these
projects will activate the
automation). By default,
only
the current project is
selected but you can select
more.
- Fill out the trigger's property
fields. In our case, we
selected an existing
tag.
- Click
the action field
in
the Then section.
- Select Send HTTP
request from
the dropdown.
- Paste the copied
URL from
Zapier.
- Choose Post as the HTTP method.
- Populate your Payload content (aka the data used to populate the new Google Sheets row).📝 Payload content must be entered in JSON format.💡 Combine static text with dynamic fields which allow you to include key task deal properties in your payload content.
- Click Create to
complete the automation's
setup.
The automation is created and will
run when the next trigger event
occurs. Don't take our word
for it — we'll test the connection
next.
Step 3: Test
the connection
Trigger the automation in
Teamwork.com to test the Zapier
connection:
- Switch to the
project's Table view. You
need to use a project that's
included in the
automation.
- Perform the trigger action. In our
example, we'd add the trigger's
tag to a task.
- Return to the Zap setup in
Zapier.
- Select Test trigger below
the URL field.
- Click Continue.
Zapier tests the trigger
and
will confirm that it's running
correctly. If the test
fails,
it's time to go back and make
needed
updates.
Step 4:
Complete the Zap setup in
Zapier
- Select Google Sheets as
the action app.
- Choose Create Spreadsheet row as the event.

- Click Continue.
- Select the relevant Google account you
wish to use. If you don't
already have an account
authenticated in
Zapier, you'll need to do that
here.
- Configure the automation by selecting what and where to pass data:
Google Drive Select the drive with the spreadsheet you want to link.Spreadsheet Choose a spreadsheet for the automation to post to.Worksheet Specify an individual worksheet in the selected spreadsheet.Mapped fields Map the data being passed via the HTTP request to the desired columns.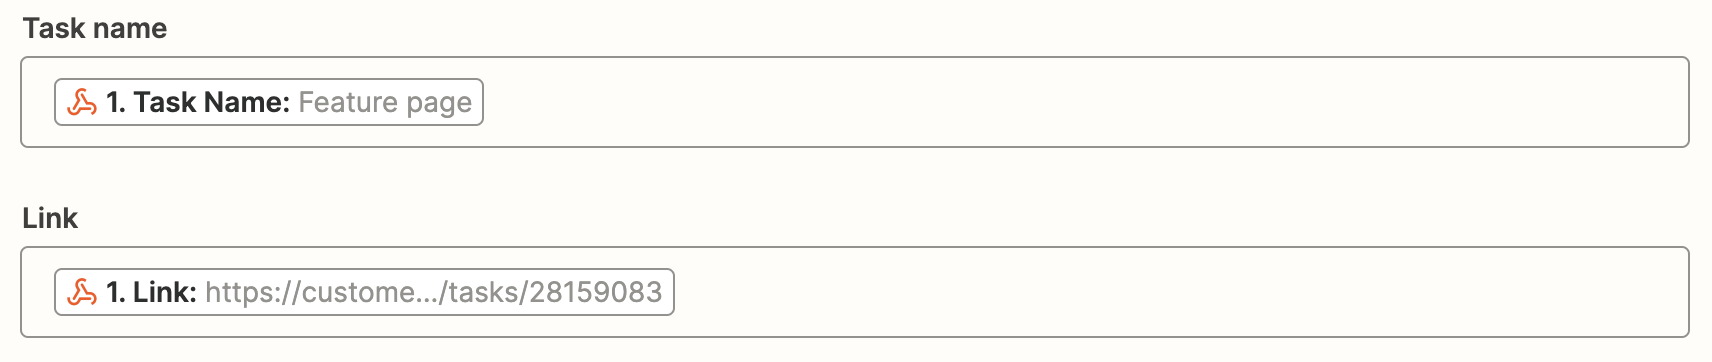
Google Drive Select the drive with the spreadsheet you want to link.Spreadsheet Choose a spreadsheet for the automation to post to.Worksheet Specify an individual worksheet in the selected spreadsheet.Mapped fields Map the data being passed via the HTTP request to the desired columns. - Click Continue.
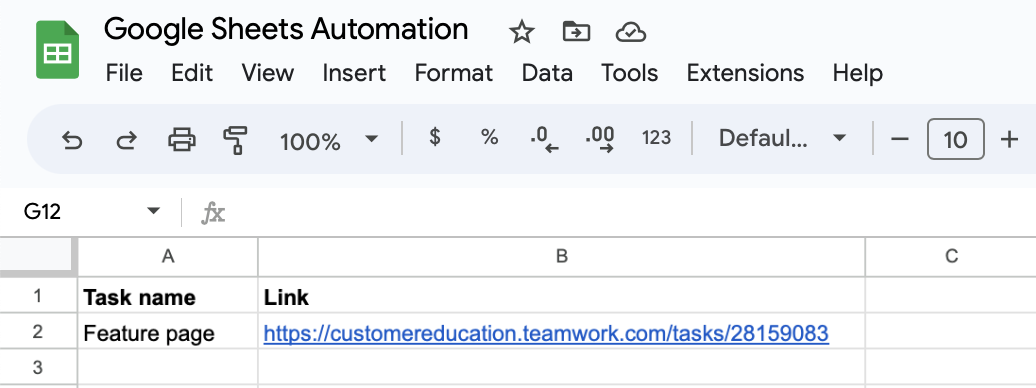
- Click Test action. Automation magic: The task you added a tag to in the earlier test is added as a row in the linked sheet.
- Click Publish
Zap.
Your automation is live. Now, when the
designated tag is added to a task (in the
specified project), a new row with the
task details carried over via the HTTP
request is added.
Best
practices
- Contextual updates: Use supported dynamic field variables to include key task information in payloads.
- Automate more: Create automations for any repeatable action and save yourself time (and eliminate room for error...or forgetfulness).