
✔ Available
on
all subscriptions
| What | Use timers as you work
to track
time with ease. |
| Why |
|
| Who |
|
| When | Any time you're working on a
project or task, especially if
it's work you'll be billing
for! |
| What | Use timers as you work
to track
time with ease. |
| Why |
|
| Who |
|
| When | Any time you're working on a
project or task, especially if
it's work you'll be billing
for! |
There are multiple ways to start timers
(options below), but via the Quick
add menu is a favorite because it's so
easily accessible.
- Select + Quick add from
Teamwork.com's main navigation menu.
- Click Start timer.
 💡 Want a keyboard shortcut? Press and hold q, then press s to get a timer running.
 - Select the project time
should be
tracked against. This step's
required!
- Choose a task. This one's
optional, but we highly recommend it
for more granular time
tracking.
- Add a description.
- Click Billable
time (or non-billable time)
to choose how
time is tracked.
- Click Start timer. Now, work on your task or project while the timer runs!
When you're finished
working, skip below to the "Log
time
from a timer" section to see what
to
do.
📝 You can also start
a
timer directly on a task from a
project's
List or Table view.
- List: Hover over the task,
click the clock (
 )
icon, then
select Start Timer.
)
icon, then
select Start Timer. - Table: Hover over
the Logged time field
in the relevant task row, then
click play (
 ).
).
Use multiple
timers
Working on multiple tasks or project
each day? Set up multiple
timers so you can seamlessly switch
between them as you work.
📝 While you can
have multiple
timers on screen, only one can be actively
running at a time.
Each time you need a new timer,
simply:
- Select + Quick
Add from
Teamwork.com's main navigation
menu.
- Click Timer and fill
out
the relevant project, task and other
details.
Interact with the
timer stack
View active
timers
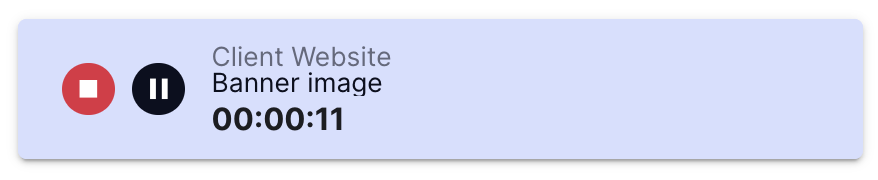
Timers stack on top
of one another
in a group and each timer
displays the associated
project, task (if set),
and
current tracked time
amount.
- Once you have more
than three active timers, scroll
through the stack to view the
remaining timers.
Move the timer
stack
Move the timer stack
around your screen
so it's not disrupting
your work, while also
remaining accessible for
easy switching. The stack
stays pinned where you place it
until you move it again.
- Single timer: Hover
over the timer. Click
and hold the set of
dots on the left, then
drag and drop the
timer to a new screen
position.
- Timer stack (multiple timers): Click and hold the header row, then drag and drop the group to a new screen position.

Collapse the timer stack
Click the
downward arrow at the top of
the timer stack to hide all
timers except the one
currently running (or most
recently used).

Manage timers
Manage which timer's
currently running, as well as
individual timers' details,
directly
from the timer stack.
Pause ( ) ) | Pause the running
timer. |
Resume ( ) ) | Resume / start a timer. |
Stop / Log time ( ) ) | Stop a timer and log the
tracked time. |
| Edit | Hover over a timer and select
the pencil to
update the associated project,
task, or description. |
| Project | Click the project
name on a timer row to
view the
project. |
| Task | Click the task name on a timer
row to view the task. |
| Pause () | Pause the running
timer. |
| Resume () | Resume / start a timer. |
| Stop / Log time () | Stop a timer and log the
tracked time. |
| Edit | Hover over a timer and select
the pencil to
update the associated project,
task, or description. |
| Project | Click the project
name on a timer row to
view the
project. |
| Task | Click the task name on a timer
row to view the task. |
Delete a timer
No longer need a
timer
you
created? You can delete
the
timer
(and its existing tracked
time).
- Hover over the timer.
- Select the pencil icon.
- Click Delete timer.
The timer is deleted
immediately.
Log time from a
timer
Log the time tracked on one of your
open timers.
- Click stop (
 )
on the
relevant timer to open
the Log time window.
)
on the
relevant timer to open
the Log time window. - Review the time log's details:📝 These are populated automatically based on the details you set when starting the timer. Adjust them as necessary.
Date Defaults to the current date. Click the date to open the date picker and select an alternative date. Who As the person who started the timer, you're the time log assignee by default. This can be switched to another project member, but we suggest each person be responsible for their own time tracking!Task If your timer is tracking time to a project (i.e. you didn't specify a task when starting the timer), you can choose a task within the project when logging the time. Mark task as complete If you're tracking time against a specific task, you can mark that task as complete once the time is logged.Start time Calculated based on time spent and end time.End time Defaults to the current time (aka when you stopped the timer).Time spent Auto-populates with the same duration as your last time entry.- When this field is
locked (),
adjusting the
start time
automatically
adjusts the end
time (and vice
versa) so that the
time spent is
maintained.
- When unlocked,
adjusting the
start or end time
automatically
changes the time
spent.
💡 Use the quick time increments (15m, 30m, 45m, 1h) to update the Time spent field.Mark as billable Ensure the Mark as billable box is checked if the time being tracked is billable.Description Set or update the time entry's description.💡 Set tags using short codes
Type #tagname or #[multi-word tag name] in the description field.Tags Click Add time log tag and select one or multiple tags to be applied to the time log.📝 Add up to 20 tags to an individual time entry. 20 tags is a lot — try and stick to tags that your team regularly leverages for reporting or tracking purposes.Date Defaults to the current date. Click the date to open the date picker and select an alternative date. Who As the person who started the timer, you're the time log assignee by default. This can be switched to another project member, but we suggest each person be responsible for their own time tracking!Task If your timer is tracking time to a project (i.e. you didn't specify a task when starting the timer), you can choose a task within the project when logging the time. Mark task as complete If you're tracking time against a specific task, you can mark that task as complete once the time is logged.Start time Calculated based on time spent and end time.End time Defaults to the current time (aka when you stopped the timer).Time spent Auto-populates with the same duration as your last time entry.- When this field is
locked (),
adjusting the
start time
automatically
adjusts the end
time (and vice
versa) so that the
time spent is
maintained.
- When unlocked,
adjusting the
start or end time
automatically
changes the time
spent.
💡 Use the quick time increments (15m, 30m, 45m, 1h) to update the Time spent field.Mark as billable Ensure the Mark as billable box is checked if the time being tracked is billable.Description Set or update the time entry's description.💡 Set tags using short codes
Type #tagname or #[multi-word tag name] in the description field.Tags Click Add time log tag and select one or multiple tags to be applied to the time log.📝 Add up to 20 tags to an individual time entry. 20 tags is a lot — try and stick to tags that your team regularly leverages for reporting or tracking purposes. - When this field is
locked (),
adjusting the
start time
automatically
adjusts the end
time (and vice
versa) so that the
time spent is
maintained.
- Click Log time.
The time is tracked to the selected
project (or task) and can be viewed in the
project's Time section.
Best practices
- Create a routine: Start your
day by going to My
work to see what
needs to be worked on, then start a
timer for the appropriate task to keep
track as you work.
- Review timers at the end of the
day: Before you log off for
the day, log any recorded time on your
open timers so that 1) you record time
on the day you actually worked on
something, and 2) you start fresh the
next day.
- Track time holistically: Use
placeholder tasks to track common
aspects of daily work not associated
with any specific client project,
allowing your team to track all parts
of their day.
- Ex. Create a task list called
"Time Logs" and create tasks such
as "Lunch," "Performance Reviews,"
"PTO" (personal time off), and
"Meeting." Everyone can then run
timers (or manually log time) on
these tasks when needed.
Elevate
- Efficiency: Use the Teamwork.com
Timer
Desktop App to keep all your
timers in one place (and out of your
workspace). This is especially helpful
if you're tracking time on placeholder
tasks (outlined in the Best
practices section) for general
daily work.