
Within Teamwork Desk, you can
add a new custom field on inboxes of your
choosing.
Note: Custom Fields are
only available on Premium and
Enterprise plans.
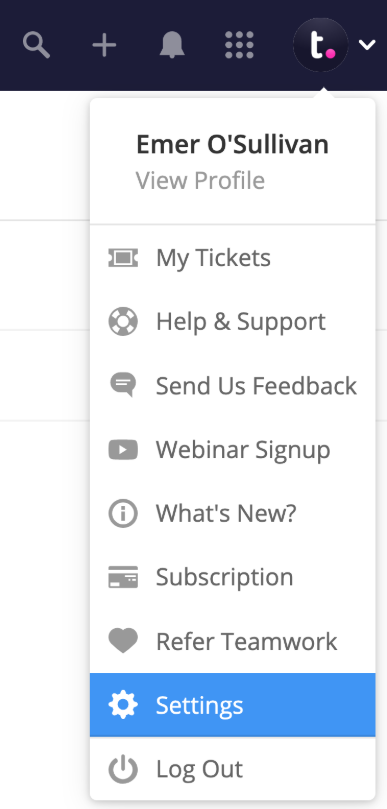
To create a custom field, click your profile icon to the top right of the
navigation bar and select Settings.
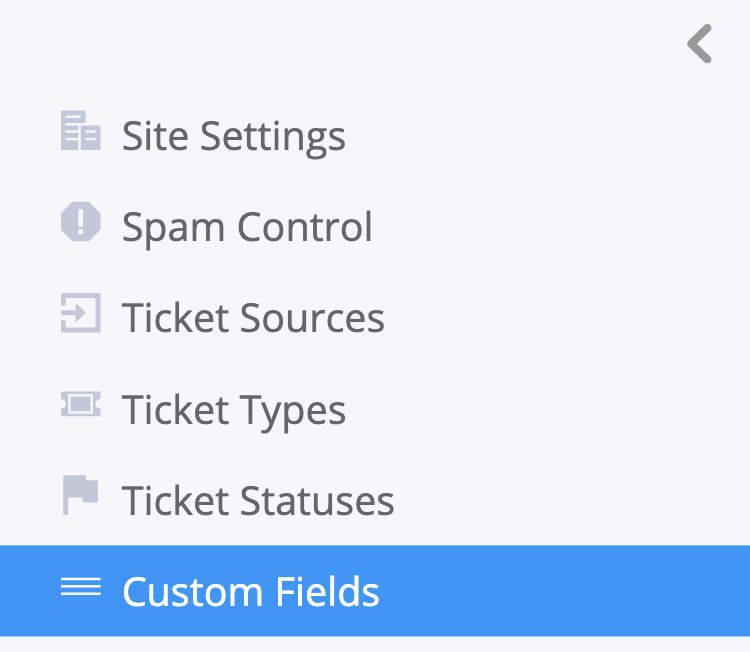
Near the top of the settings
area, go to the General subsection
and select Custom Fields from the
left sidebar.

Note: Only site
administrators can access and update
custom fields.
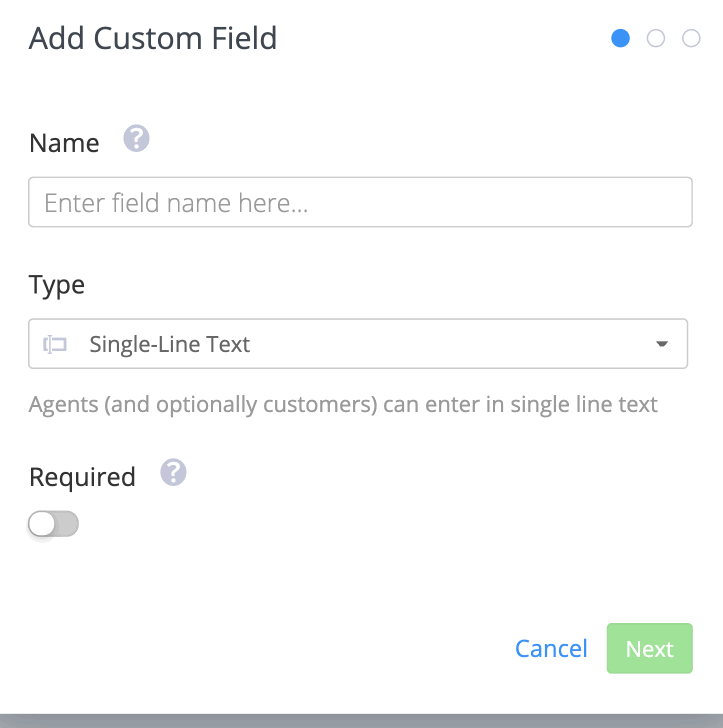
You will now have the option to
add a new field to the top right.

In the custom field modal, you
can enter a name (that the agents will
see) and choose a field type. At the
bottom, you can also choose whether the
field should be required for agents.
Note: By choosing to mark
the field as required, agents will be
required to fill in the field before the
ticket can be solved or closed.
Custom field types:
- Text Field - Agents (and
optionally customers) can enter in
single line text.
- Multi-Line text field - Agents (and optionally
customers) can enter multiple lines of
text.
- Dropdown - Allow agents
(and optionally customers) to choose
exactly 1 option from your pre-defined
list.
- Numbers - Accept numeric
input from agents (and optionally
customers).
- Checkbox - Allow agents
(and optionally customers) to choose 0
or more options from your pre-defined
list.
- Date - Allow agents (and
optionally customers) to select a date
from a date picker.
Once you click next, you have options to customize how customers can interact with the custom field when submitting a request or viewing a ticket in their Customer Portal account.
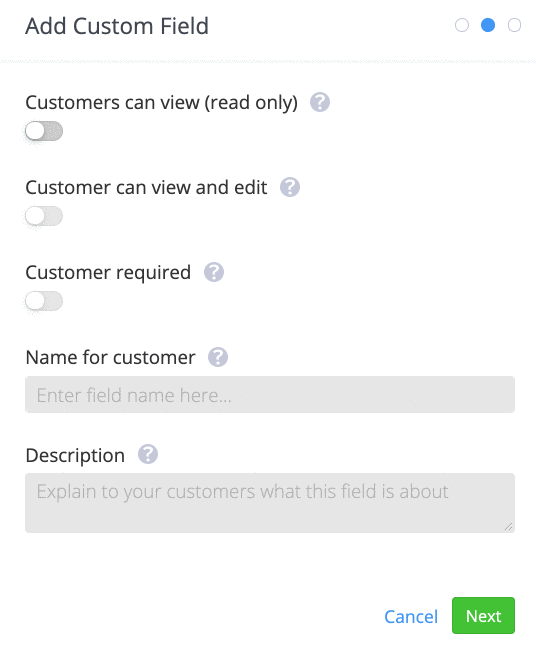
- Can view - When enabled, your
customers will be able to view the
custom field on their existing tickets in the Customer Portal. Customers will not be able to input or edit the field value.
- Can view and edit - When enabled, the custom field may be visible on the embeddable contact form and submit a request form. Customers can input information into the field and can also edit the information in the field via the Customer Portal once the ticket is created.
- Required - When you enable
this, the customer must complete this
field before submitting the
ticket or form.
- Name for customer - This is the label that
will be shown to customers if the view
toggle is enabled.
- Note: The label will not be
translated into any foreign languages.
- Description - The optional
description will be shown to customers via a tooltip on the contact form.
The last step is to choose which
inboxes you would like to apply the new
custom field to. You can toggle on the
switch to the right of each inbox.
Alternatively, you can use
the Select all option to
enable the custom field for all
inboxes.

To apply the custom field to all new inboxes created, you can toggle on the option Apply to all future inboxes.
You can then choose Save to create the custom
field.
Note: Custom field
data can be included in the task
description when creating a Teamwork task from a ticket.
For more information, see: Enabling or Disabling Custom Fields